Creating beautiful jewelry often involves intricate beading and knotting techniques. One essential tool that simplifies this process is the beading knotting tool. This tool is invaluable for both beginner and advanced jewelry makers, providing precision and ease in crafting necklaces, bracelets, and other beaded items. Therefore, understanding the beading knotting tool’s components, uses, and benefits is essential for enhancing your jewelry-making skills. This comprehensive guide explores different types of knotting tools, step-by-step instructions for their use, and tips for achieving professional results. By following these insights, you can master the art of beading knotting and create stunning pieces of jewelry.
Understanding the Beading Knotting Tool
The beading knotting tool is designed to simplify and enhance the knotting process in jewelry making. Therefore, exploring its components and uses helps in understanding its significance.
Components of the Knotting Tool
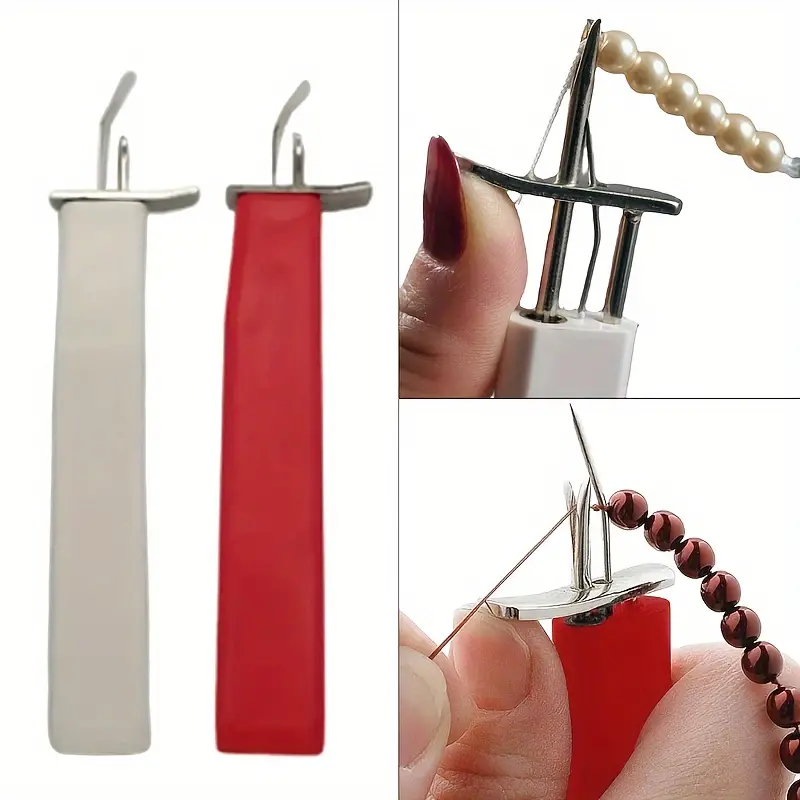
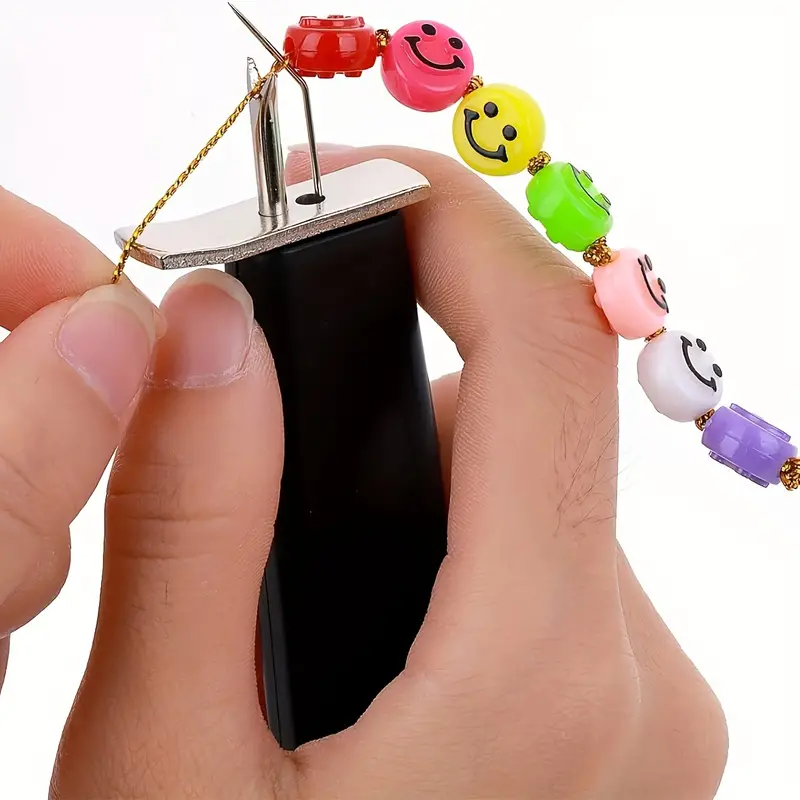
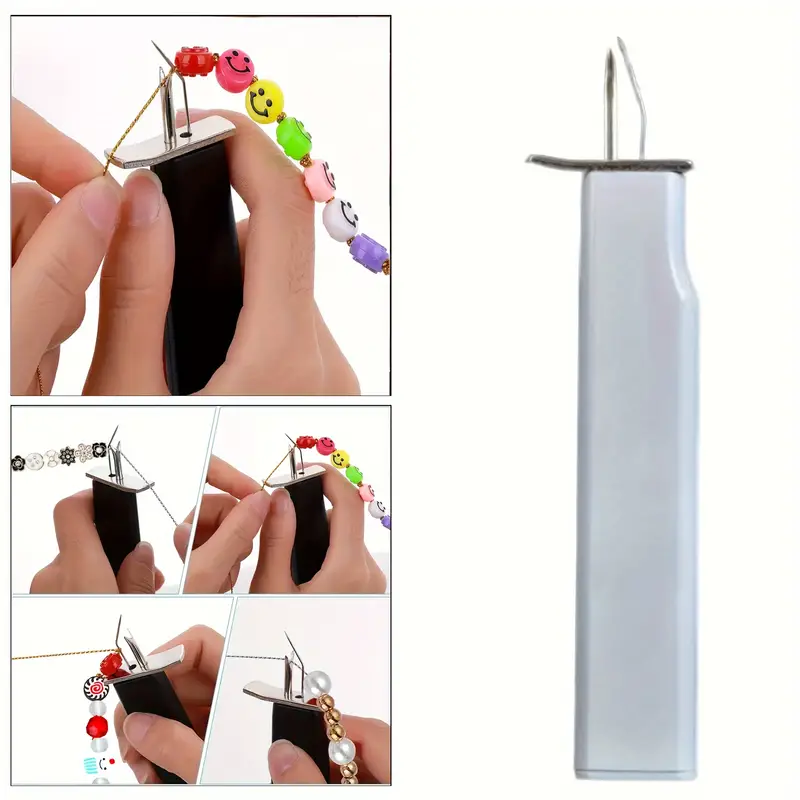
The beading knotting tool comprises several critical components that work together to create precise knots. Generally, the tool features a needle-like tip for threading beads and a hook or prong for forming and tightening knots. Some models include a handle for better grip and control during the knotting process. Additionally, certain advanced tools may come with adjustable settings to accommodate different thread thicknesses and bead sizes. Therefore, recognizing the components of the knotting tool ensures you use it effectively and comfortably.
Uses of the Knotting Tool
The primary use of the beading knotting tool is to create uniform, secure knots between beads in jewelry-making projects. These knots prevent beads from rubbing against each other, which can cause damage or wear over time. Knotting between beads also adds a decorative and professional touch to the finished piece. The tool is particularly useful for stringing pearls and gemstones, which often require delicate handling. Therefore, understanding the uses of the knotting tool highlights its importance in creating durable and aesthetically pleasing jewelry.
Types of Beading Knotting Tools
Various types of beading knotting tools are available, each offering unique features and benefits. Therefore, exploring these options helps you choose the best tool for your needs.
Classic Knotting Tools
Classic knotting tools are simple and effective, consisting of a needle and hook or prong. These tools are manually operated and require a bit of practice to master. They are affordable and widely available, making them an excellent choice for beginners. Classic knotting tools are efficient for creating single knots and are suitable for most basic jewelry-making projects. Therefore, recognizing the simplicity and utility of classic knotting tools ensures an accessible entry point for novices.
Automatic Knotting Tools
Automatic knotting tools offer advanced features designed to streamline the knotting process. These tools often come with a built-in mechanism that automatically forms and tightens knots with minimal effort. Automatic knotting tools are ideal for large-scale projects or for those who create jewelry professionally. They provide consistent results and reduce the time and effort needed to create each knot. Therefore, understanding the advantages of automatic knotting tools highlights their value for efficiency and precision.
Step-by-Step Guide to Using the Knotting Tool
Mastering the use of the beading knotting tool involves following a systematic approach. Therefore, exploring a step-by-step guide ensures effective and accurate results.
Preparation and Setup
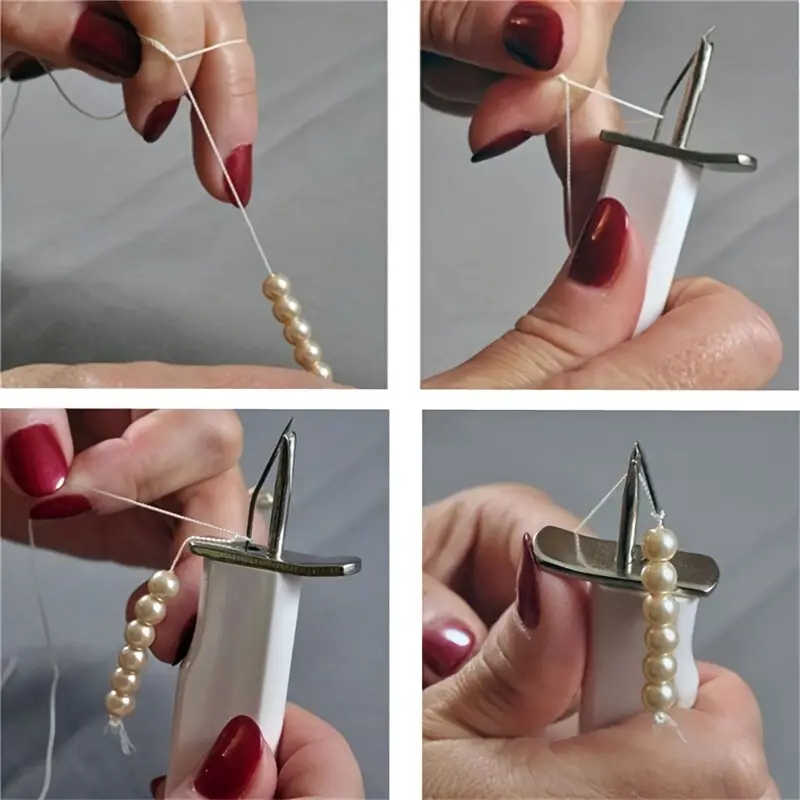
The first step is preparing your materials and setting up the knotting tool and workspace. Select your beads, thread, and knotting tool, ensuring all components are clean and ready for use. Measure and cut the desired length of thread, allowing extra for knots and finishing. Thread your needle and secure the first bead with a double knot to prevent it from slipping off. Setting up a comfortable and well-lit workspace enhances focus and precision. Therefore, recognizing the importance of preparation and setup ensures a smooth and efficient knotting process.
Creating the First Knot
To create the first knot, thread the bead onto the string and position it near the end knot. Use the needle or tool tip to form a loop, then slide the loop down to the bead, positioning it snugly against the bead. Use the hook or prong to tighten the knot, ensuring it’s secure and close to the bead without gaps. Practice this step several times to become comfortable with the motion and tension required. Therefore, understanding the technique for creating the first knot ensures a strong and precise start.
Advanced Techniques and Tips
Advanced techniques and tips can enhance your proficiency and creativity in using the beading knotting tool. Therefore, exploring these strategies helps you achieve professional-quality results.
Double Knotting for Security
Double knotting between beads provides added security and durability for your jewelry pieces. To create a double knot, simply form and tighten two knots in succession before adding the next bead. This technique ensures that if one knot loosens, the other remains intact, offering additional protection. Double knotting is particularly beneficial for high-stress areas, such as clasps or the center of a necklace. Therefore, recognizing the benefits of double knotting ensures more durable and reliable jewelry pieces.
Incorporating Decorative Elements
Incorporating decorative elements, such as spacers, charms, and pattern variations, adds visual interest to your jewelry. Experiment with different types and sizes of beads to create unique designs and textures. Using contrasting thread colors can also enhance the overall aesthetic. Consider incorporating knots as design elements by making them visible and part of the pattern. Therefore, understanding how to include decorative elements ensures personalized and visually appealing jewelry.
Caring for Your Knotting Tool
Proper care and maintenance of your beading knotting tool ensure its longevity and optimal performance. Therefore, exploring care tips helps preserve your tool and enhance its usability.
Cleaning and Storage
Regular cleaning of your knotting tool prevents residue buildup and ensures smooth operation. Wipe the tool with a soft cloth after each use to remove any dirt or thread fragments. Store the tool in a protective case or designated storage area to prevent damage and maintain its condition. Avoid exposing the tool to extreme temperatures or moisture to prevent rust or corrosion. Therefore, recognizing the importance of cleaning and storage ensures the tool’s durability and effectiveness.
Sharpening and Maintenance
Occasional sharpening of the needle-like tip ensures precise and efficient knotting. Use a fine-grit sharpening stone or professional sharpening service to maintain the tool’s sharpness. Regularly check the tool for any signs of wear or damage, such as bent tips or loose components, and repair or replace them as needed. Proper maintenance ensures consistent performance and enhances the tool’s lifespan. Therefore, understanding the necessity of sharpening and maintenance emphasizes the importance of regular upkeep.
Choosing the Right Tool for Your Projects
Selecting the appropriate beading knotting tool for your specific projects is crucial for achieving the desired results. Therefore, exploring factors to consider helps make informed decisions.
Project Complexity and Scale
The complexity and scale of your project significantly influence the choice of knotting tool. For simple, small-scale projects, a classic knotting tool is often sufficient. However, for intricate designs or large-volume production, an automatic tool provides better efficiency and consistency. Assessing the requirements of your project ensures you choose a tool that meets your needs and enhances your productivity. Therefore, recognizing the role of project complexity and scale supports effective tool selection.
User Comfort and Skill Level
User comfort and skill level are important considerations when choosing a knotting tool. Beginners may prefer simpler tools with basic features, while experienced users might benefit from advanced tools with automatic functions. The tool’s ergonomic design and ease of use also impact comfort during extended use. Trying different tools and reading user reviews can help determine the best fit for your comfort and skill level. Therefore, understanding the importance of user comfort and skill level ensures a positive and productive experience.
Conclusion
Understanding the beading knotting tool involves exploring its components, uses, types, and techniques, as well as proper care and selection. Proper knowledge ensures effective and enjoyable jewelry-making.
Exploring elements like the tool’s components and uses, recognizing the importance of preparation, and identifying techniques for creating knots and customization provides valuable insights. Recognizing the significance of care, maintenance, and tool selection further enriches the understanding.
By engaging with tips for advanced techniques and user comfort, you can enhance your proficiency and creativity in using the beading knotting tool. Therefore, whether you are a beginner or an experienced jewelry maker, understanding these aspects offers practical and valuable insights. Embrace the opportunity to master the beading knotting tool, knowing you have the knowledge and resources to create beautiful, professional-quality jewelry!