Introduction to Router Beading Bits
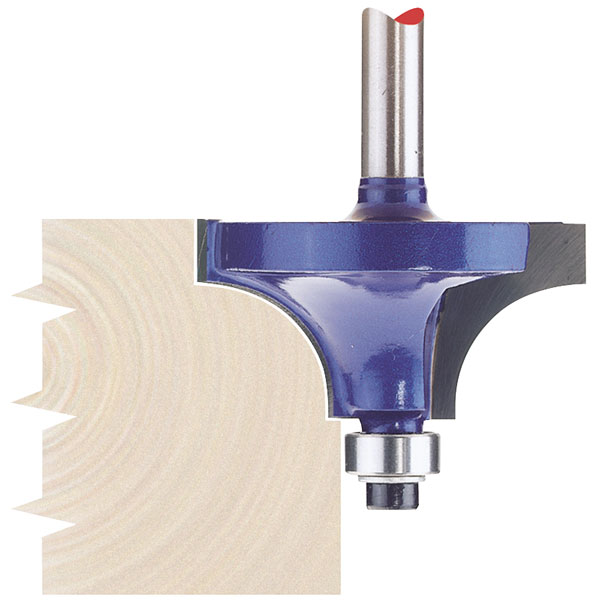
Router beading bits are essential tools for woodworkers. They shape edges with a rounded profile. Enhanced with decorative beads, these bits enrich project aesthetics. Good router beading bits also improve woodworking precision. Woodworkers must select bits that match their project needs. Understanding bit profiles ensures the right pick for each task. In this guide, we cover everything about router beading bits. From selection to safety, each step gets due attention. Knowing your router and bits well elevates your woodworking craft.
Essential Guide to Choosing the Right Beading Bit
Choosing the right router beading bit is crucial for your woodworking projects. The selection can make or break the quality and aesthetics of your work. Here are some key points to consider when selecting a beading bit:
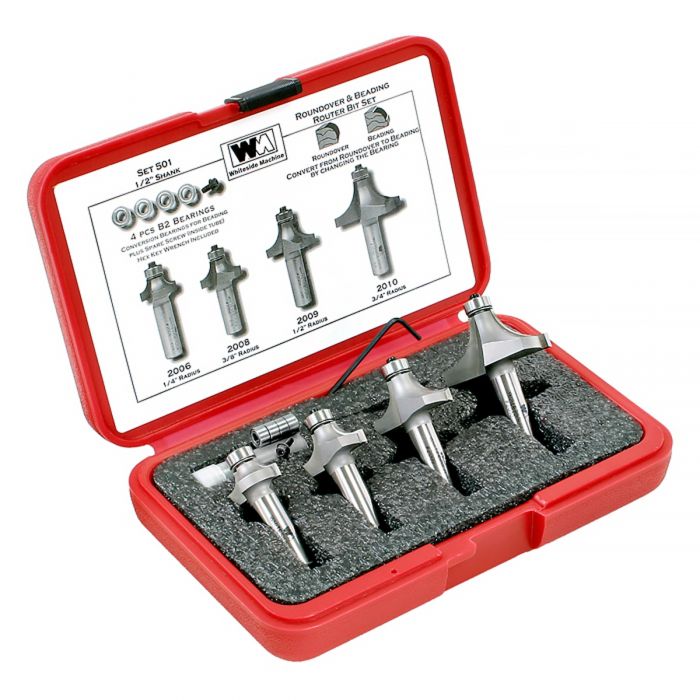
- Determine the Size: Match the bit size to your project’s scale. Smaller bits suit fine work, larger ones are for bigger projects.
- Consider the Shape: Beading bits come in various shapes. Select the one that gives the desired edge profile.
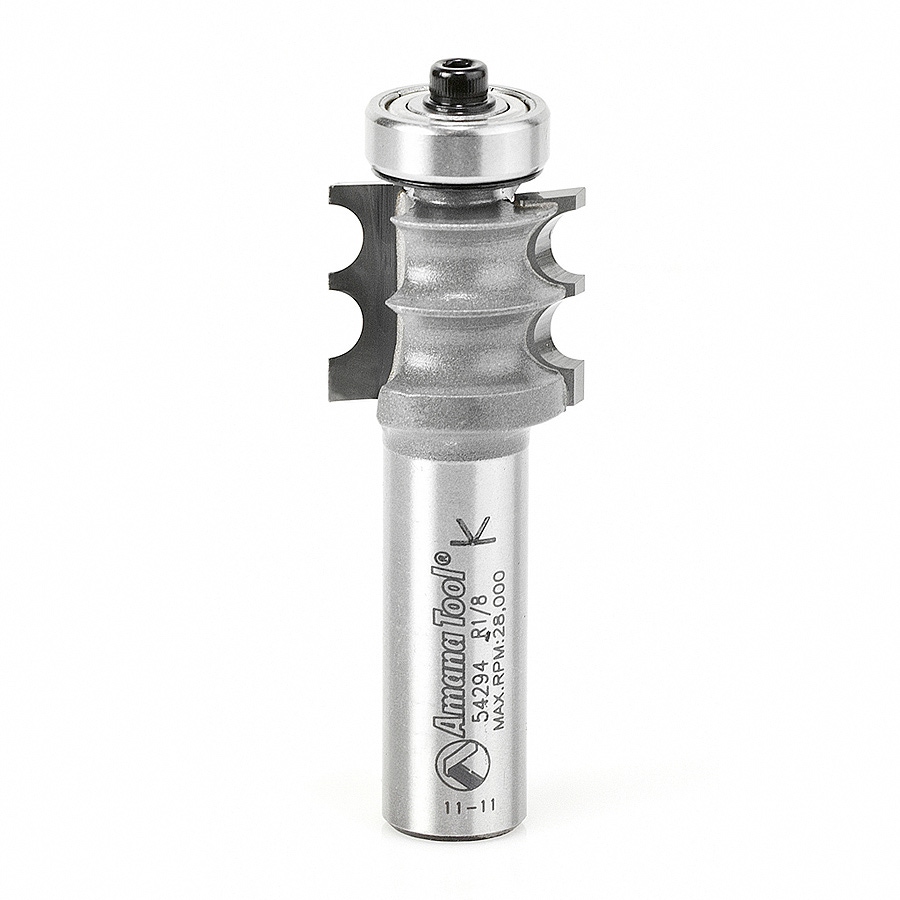
- Material Matters: Bits are made from different materials. High-quality carbide-tipped bits are durable and precise.
- Shank Size: Routers have either a 1/4 inch or 1/2 inch collet. Choose the bit shank that fits your router.
- Compatibility: Ensure the bit is compatible with your router’s speed and power specifications.
When choosing a router beading bit, it’s not just about the price. It’s the blend of size, shape, material, shank size, and compatibility that will determine the success of your woodworking endeavors. Keep these factors in mind, and you’ll enhance your woodworking with perfectly crafted beads every time.
Setting Up Your Router for Beading
Setting up your router for beading is a simple process. Follow these steps to ensure your router is ready for beading work:
- Secure the Router: Firstly, make sure your router is stable. Anchor it to a workbench or a router table.
- Insert the Beading Bit: Choose the right router beading bit for your project. Insert it into the collet firmly.
- Adjust the Bit Height: Set the beading bit to the desired height. Ensure it matches the thickness of your material.
- Test the Setup: Before you start on your workpiece, test the setup. Use a piece of scrap wood to check the profile.
- Check the Speed: Read your router’s manual. Set the correct speed for the size of your beading bit.
- Secure the Material: Clamp down the wood you’ll be working. It should not move during the routing process.
- Use Guides if Needed: Attach a fence or a guide bushing for consistent beads along the edge of your workpiece.
Make these settings carefully. It ensures your work is both precise and safe. You will get clean, consistent beads on all your woodworking projects.
Step-by-Step Process: How to Use Beading Bits
Using a router beading bit is a precise process that enhances woodworking projects. Follow these steps to ensure successful beading:
- Secure the Router: Always begin by securing your router on a stable surface. This prevents any movement that could disrupt your work.
- Insert the Beading Bit: With the router off, insert the chosen beading bit until it sits firmly in the collet.
- Set Bit Height: Adjust the bit to the correct height. It should align with the thickness of your material.
- Adjust Router Speed: Consult the manual and set the router to the right speed for the bit size you are using.
- Test on Scrap Wood: Before working on the actual piece, test the bit on scrap wood to ensure it cuts correctly.
- Guide the Router: Gently guide the router along the wood’s edge where you want the bead. Use steady, even pressure.
- Turn Off the Router: After completing the beading, turn off the router and wait for the bit to stop completely before making adjustments or changing the bit.
- Inspect the Bead: Check the beaded edge for smoothness and consistency. Make any necessary adjustments to the setup if the bead isn’t perfect.
- Repeat as Needed: If the project requires multiple beads, repeat the process, ensuring consistent quality each time.
These steps help you craft perfect beading. Practice and attention to detail are key to mastering the use of a router beading bit.
Common Applications for Beading Bits in Projects
Router beading bits serve versatile roles in woodworking. They are not just for edge detailing. Here are common projects where beading bits enhance your work:
- Door and Window Casings: Router beading bits add ornate details to frames. They give doors and windows a classic finish.
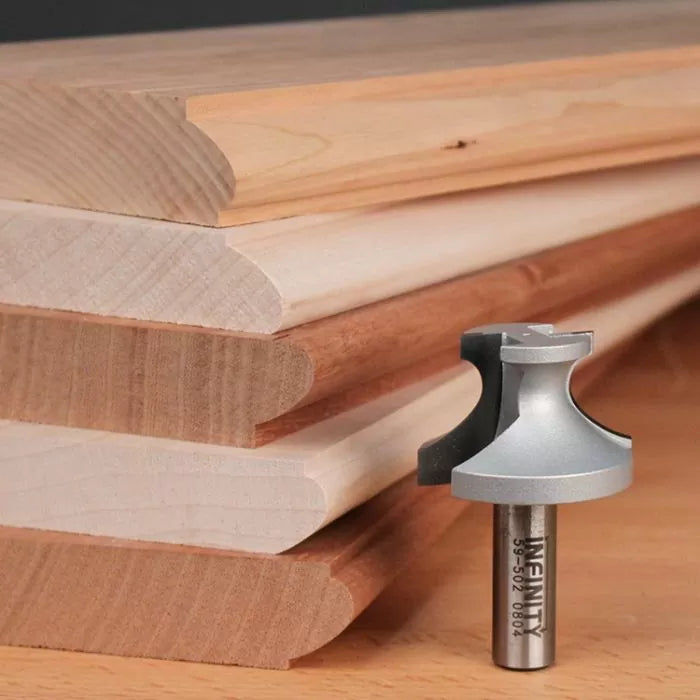
- Furniture Edges: Apply beads to shelves, desks, or table edges. This detail can elevate the furniture’s look.
- Decorative Moldings: Craft custom moldings with a unique touch. Beading bits help in creating distinct, attractive patterns.
- Jewelry Boxes and Small Cabinets: Small projects benefit from delicate beading. It adds a refined look to your pieces.
- Picture Frames: A beaded edge on frames can complement the artwork it holds. It’s a subtle but effective enhancement.
In each project, router beading bits turn simple pieces into works of art. Their applications extend as far as your creativity goes. Use a beading bit to give any woodwork a unique, finished appearance.
Tips and Tricks for Finishing Perfect Beads
Achieving perfect beads with a router beading bit requires more than just following basic steps. To elevate your woodworking projects, apply these tips and tricks:
- Maintain Sharp Bits: Always use sharp router beading bits. Dull tools can tear the wood, ruining the finish.
- Control Feed Rate: Move the router at a consistent pace. Too fast can lead to an uneven bead; too slow may burn the wood.
- Start with Practice: Always practice on scrap wood first. This helps avoid mistakes on the final piece.
- Clear Debris Regularly: Remove sawdust and wood chips often. Build-up can affect the router’s performance.
- Use Sub-fences: Add sub-fences to your router table for extra support. This can help control the workpiece during routing.
- Keep a Steady Hand: Hold the router firmly and apply even pressure. This ensures smooth passage along the wood’s edge.
- Check the Bit Set-Up: Double check your bit height and tightness before starting. A bit that slips can ruin the bead profile.
- Finish with Sanding: After routing, gently sand the beaded edges. This step will remove any imperfections and soften sharp edges.
Remember, patience and practice are essential for mastering the use of beading bits. Keep these tips in mind, and you’ll produce stunning beads on every project.
Safety Precautions While Using Beading Bits
When you’re working with router beading bits, safety should always be your top concern. Here are essential safety tips to follow:
- Wear Safety Gear: Always wear safety glasses. Protect your eyes from flying wood debris.
- Secure Your Workpiece: Clamp down the wood well. Make sure it won’t move while routing.
- Keep Fingers Away: Your fingers should be far from the bit. Use push blocks or sticks if needed.
- Check the Bit Before Use: Inspect the bit for damage. A compromised bit is a safety risk.
- Don’t Force the Router: Let the bit do the work. Forcing the router can cause it to kick back.
- Turn Off Before Adjusting: Always turn off the router before changing settings or bits.
- Work Against the Cutter: Feed the wood against the rotation of the bit. It gives you control.
- Avoid Distractions: Stay focused on your task. Distractions can lead to accidents.
- Read the Manual: Understand your router’s features. Know how to handle it safely.
- Keep a First Aid Kit Nearby: Equip your work area with a basic first aid kit. Be prepared for any minor injuries.
By following these safety procedures, you create a safer working environment. You help prevent accidents and ensure smooth woodworking operations.
Maintenance and Care for Your Beading Bits
Proper maintenance and care of your router beading bits are essential for longevity and performance. Here’s how you can keep your bits in top condition:
- Clean After Use: Always wipe your bits clean after every use. Removing resin and wood sap prevents build-up.
- Inspect for Wear: Regularly check for signs of dulling or damage. Dull bits affect precision and quality.
- Resharpen as Needed: Have your bits resharpened by professionals when they get dull. This restores their cutting edge.
- Store Properly: Keep bits in a protective case. It prevents them from banging against each other.
- Lubricate the Shank: Apply a light oil to the shank. It helps prevent rust and ensures smooth collet insertion.
- Avoid Overheating: Don’t push bits too hard. Overheating can damage the bit’s cutting edge and reduce its life span.
- Handle with Care: Bits are delicate. Dropping them can cause chipping or misalignment.
By following these maintenance steps, your router beading bits will remain sharp, accurate, and ready for your next woodworking project. Always remember that taking care of your tools is as important as the skill you apply in your woodworking endeavors.