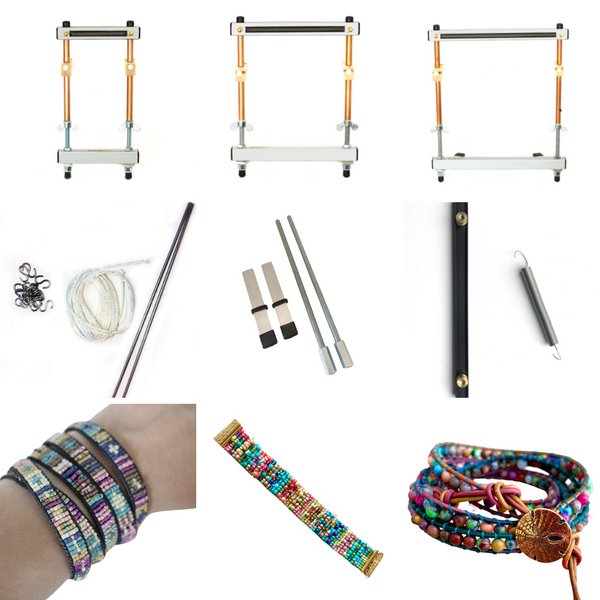
What is a Beading Loom?
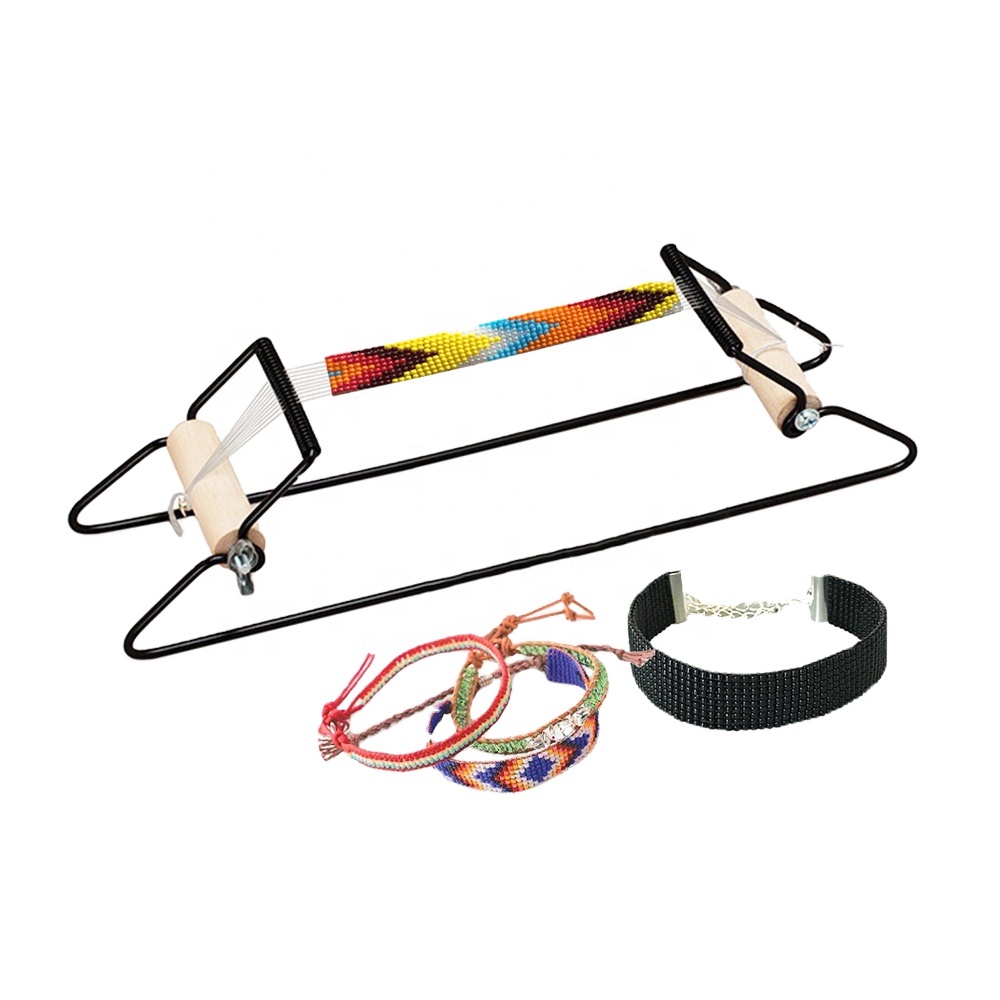
A beading loom is a tool that helps create intricate beadwork designs. It’s a frame that holds threads taut while beads are woven in to make patterns. Think of it like a mini loom for beads. This tool is key for anyone who wants to explore the world of bead weaving. With a beading loom, you can craft bracelets, necklaces, belts, and even artwork. Its design can be simple for beginners or quite complex for advanced users.
Beading looms come in various shapes and sizes. Some are small and portable, great for those just starting. Others are larger and more durable, meant for complex projects. The loom contains rows of parallel threads called warps. These serve as the backbone for your beadwork. You ‘weave’ smaller beads between the warps using a secondary thread called the weft. The process is somewhat similar to traditional weaving, but on a smaller scale and with beads.
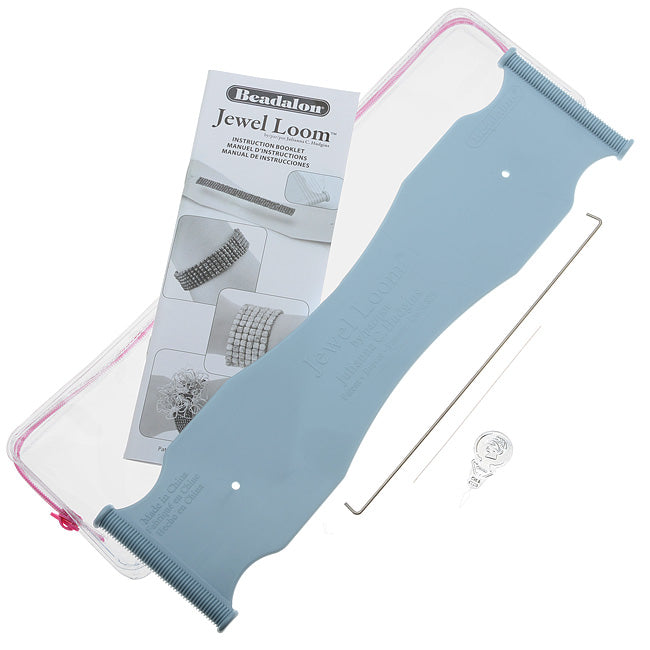
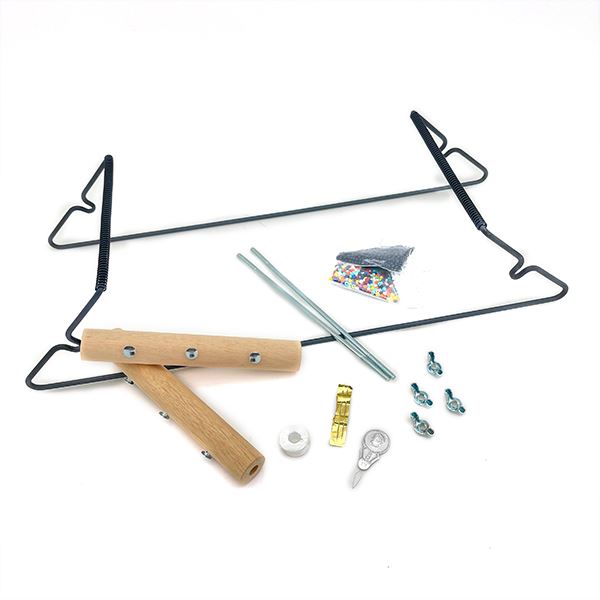
Even if someone has never tried it before, a beading loom kit makes it easy to get started. Most kits include the loom itself, needles, threads, and beads. They often come with instructions to guide new users through the setup and basic techniques. For creative individuals interested in crafting unique jewelry pieces, learning to use a beading loom is an exciting step. It opens up a new realm of possibilities for creating personal and bespoke items.

Essential Components of a Beading Loom Kit
When starting with bead weaving, a beading loom kit is essential. It includes everything needed to begin your beading journey. Let’s break down the key components of a typical beading loom kit.
- Loom Frame: This is the backbone of the kit. It holds the warp threads tight for weaving beads.
- Warp Threads: These are the vertical threads on the loom. They form the base for your designs.
- Weft Threads: The horizontal threads that you weave through the warp threads, adding beads as you go.
- Beeds: They are the heart of your project. Beads come in various sizes, shapes, and colors.
- Needles: Special needles that are thin and long are necessary to weave beads on the loom.
- Threader: It helps to easily thread the small eye of the beading needle.
- Scissors: To cut threads, a small and sharp pair of scissors is crucial in a kit.
- Pattern Instructions: Most kits include guides for setting up and starting simple patterns.
These components are the foundation of any beading loom kit. They work together to help you create beautiful beadwork. Remember, the quality of these components can affect the ease of use and the final result of your projects. So, choose a kit that provides durable and user-friendly materials.
How to Choose Your First Beading Loom Kit
Selecting your first beading loom kit requires consideration of several factors. Here’s a brief guide to help you make an informed decision:
- Skill Level: Match the kit to your experience. Beginners should opt for simpler looms with clear instructions.
- Project Size: Consider what you want to make. Smaller projects need a more compact loom, while larger ones require more space.
- Portability: If you plan to bead on the go, choose a lightweight, small loom that’s easy to carry.
- Material Quality: Durable materials ensure your loom withstands the tension of threads. Look for sturdy construction.
- Adjustability: Some looms allow you to adjust the tension and the length of the warp threads. This is a valuable feature as you progress in skill.
- Accessories: Confirm the kit includes all the necessary tools and materials. These should be of good quality.
- Budget: Kits can vary in price. Set a budget but be willing to invest in quality for a better beading experience.
- Reviews and Recommendations: Read opinions from other beading enthusiasts. Their experiences can guide you to a reliable choice.
With these points in mind, you’ll find a beading loom kit that best suits your needs and helps kickstart your beading adventure. Remember, the right kit can enhance your crafting experience and the quality of your beadwork creations.

Step-by-Step Guide to Setting up Your Beading Loom
Setting up your beading loom kit can seem daunting at first. But with these simple steps, you can begin your bead weaving journey smoothly. This guide will walk you through the process, ensuring your setup is correct for optimal beading.
- Assemble Your Loom: Follow the instructions to put together your loom framework. Make sure all parts are secure.
- Prepare the Warp Threads: Position the warp threads vertically across the loom. They should be evenly spaced and tight.
- Attach the Threads: Tie the ends of the warp threads to the loom. Some looms have pegs or grooves for this purpose.
- Thread the Needle: Use the threader to ease the weft thread through the eye of the needle.
- Plan Your Design: Before you start, know the pattern you’re aiming for. This guides the beading process.
- Begin Weaving: Start at one end and weave your weft thread over and under the warp threads, adding beads as you go.
- Adjust the Tension: Ensure your threads are not too loose or too tight. Adjust as necessary for a flat, even weave.
- Secure the Edges: When starting and finishing, tie off your threads securely to prevent unraveling.
- Continue Beading: Follow your pattern, and continue adding rows of beads until the design is complete.
- Finishing Touches: Once you’ve finished beading, weave in any loose ends and trim excess thread.
By following these steps, you can set up your loom properly and begin your beading projects with confidence. As you grow more familiar with the process, setting up will become quicker and more intuitive.
Basic Beading Loom Techniques and Patterns for Beginners
Embarking on your first beading loom project? Here are some fundamental techniques and patterns that are perfect for beginners.
Understanding the Basic Weave
The basic weave is the foundation of all loom beading. Start by threading your needle with the weft thread. Weave over and under the warp threads, sliding a bead into each gap. Pull the thread through, ensuring the beads sit snugly against the warp threads.
Adding and Ending Threads
You’ll often need to add new threads as you work. To do this, weave in the end of the old thread and start with a new one. Secure the threads with a knot and trim any excess. This will keep your work neat.
Creating Simple Patterns
Choose simple patterns to begin with, like stripes or checks. These require just a change in bead color but can still make an impact. Patterns can be planned out on graph paper or by using beading software.
Troubleshooting Tension Issues
Tension is critical; it keeps beads aligned and the work flat. If your beads buckle or the weave looks too loose, adjust the tension on the warp threads. Practice will make perfect.
Basic Bead Counts for Patterns
Most patterns work on a repeat count. Start with simple patterns that use easily divisible counts of beads, like sets of 4 or 5, to understand pattern repeats.
With these tips and techniques, you’ll be well on your way to creating stunning pieces using your beading loom kit. Remember, patience and practice are essential. Start with easy designs and gradually take on more complex patterns as your confidence grows.

Tips for Selecting Beads and Materials for Loom Projects
When starting a project with your beading loom kit, choosing the right beads and materials is essential. Here are some straightforward tips to guide your selection:
- Bead Size and Type: Pick beads that fit comfortably on the loom threads. Small, uniform beads, like seed beads, work best for beginners.
- Bead Quality: Look for beads with smooth edges to avoid snagging the threads. High-quality beads provide a better finish.
- Thread Match: Use a thread that matches your beads in color. This helps hide the thread in your finished product.
- Thread Strength: Choose a strong, durable thread that can hold the tension without breaking.
- Tools Check: Ensure your kit’s needles work with the bead size you’ve selected. Tiny beads need thinner needles.
- Color Selection: Plan your color scheme ahead. Pick colors that contrast well for a striking effect.
- Material Budgeting: Assess how many beads and how much thread you’ll need. Buy a bit extra to avoid running out mid-project.
By considering these aspects, you ensure your beading loom projects start off on the right foot. Proper material selection leads to more enjoyable beading and impressive results.
Common Mistakes to Avoid When Using a Beading Loom
When working with a beading loom kit, it’s easy for beginners to stumble. To help you avoid common pitfalls, here are some mistakes to watch out for:
- Ignoring Tension: Keeping the right tension on the warp threads is crucial. Too tight, and they might snap. Too loose, and your beads won’t sit flat. Always check tension before you start.
- Skipping the Setup: Don’t rush setting up your loom. A poorly set up loom can lead to problems later on. Follow the steps carefully.
- Using Mismatched Bead Sizes: Stick to beads of the same size and shape for uniformity. Mixing sizes can result in an uneven finish.
- Forgetting to Plan: Without a pattern plan, you can lose track of your design. Always start with a pattern or guide in mind.
- Neglecting the Ends: Secure the beginning and end of your work. Knotting the threads helps prevent unraveling.
- Overlooking Empty Warp Threads: Make sure every warp thread has a bead. Missing beads create gaps in your work.
- Overfilling Your Weave: Don’t force too many beads between warp threads. This can buckle your work or break the threads.
By keeping these points in mind, you’ll navigate the common mistakes with your beading loom kit and enjoy a smooth beading experience.
Additional Resources for Beading Loom Enthusiasts
For those who’ve embarked on their beading loom journey, there’s always more to learn and explore. Here are valuable resources to deepen your knowledge and enhance your beading skills:
- Online Forums and Communities: Join beading forums or social media groups. Share your work, get feedback, and connect with fellow enthusiasts.
- Beading Books and Magazines: Look for publications dedicated to beading. They offer patterns, tips, and the latest trends in beadwork.
- Beading Classes: Local craft stores or community centers often host beading workshops. Learn new techniques and meet other hobbyists.
- Video Tutorials: Online platforms provide step-by-step guides on various patterns and techniques. Watch and practice at your own pace.
- Beading Software: Use software to design patterns. It’s a great way to visualize your work before starting.
- Craft Shows and Exhibits: Attend events to find inspiration and see a wide range of beadwork. You might also discover new beads and equipment.
- Beading Kits and Subscriptions: Subscribe to a beading kit service. Receive new patterns and materials regularly to challenge your skills.
By using these resources, you’ll stay inspired and continue growing as a beading loom artist.
