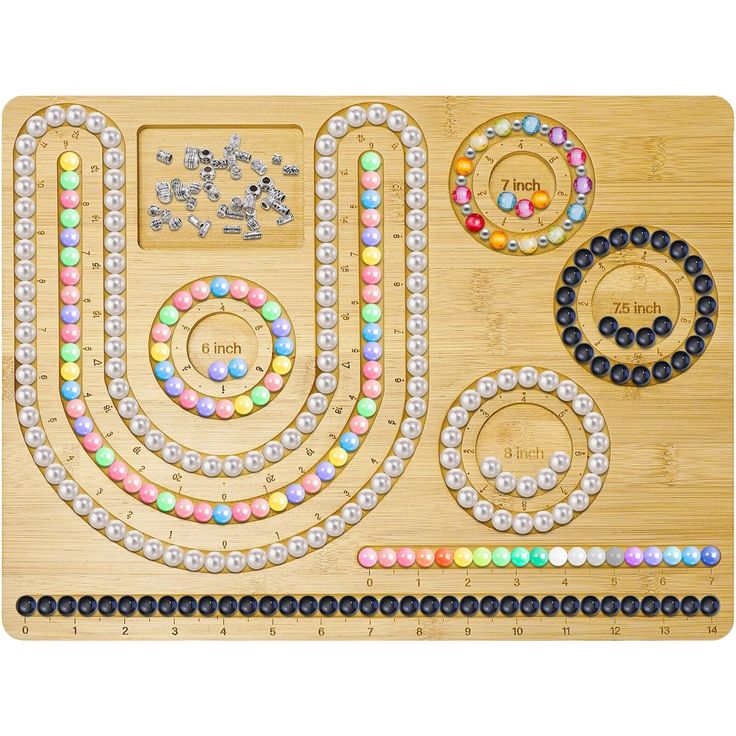
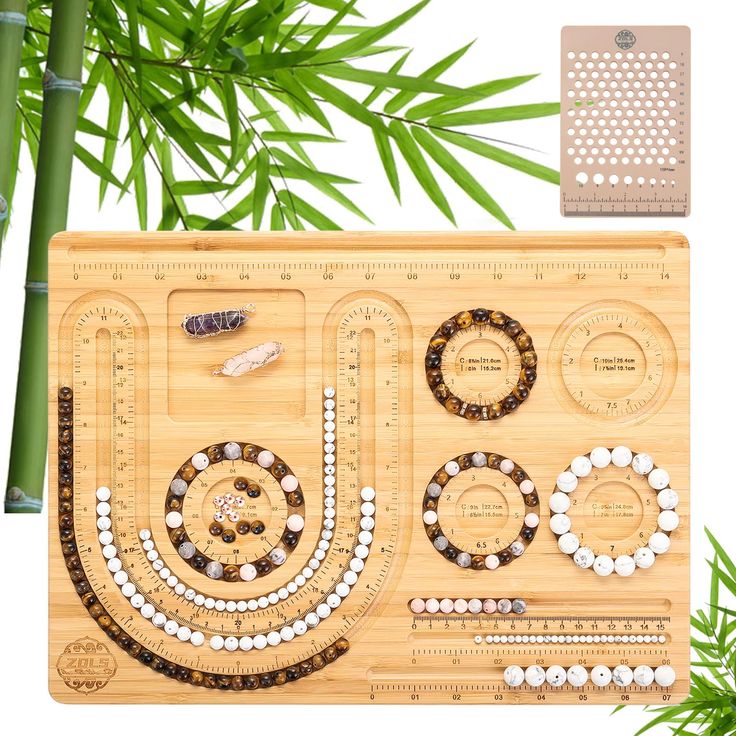
Choosing the Right Beading Board
Choosing the right beading board for bracelets is crucial. It serves as your blueprint for designs and keeps components organized.
Types of Beading Boards
There are several types of beading boards to consider:
- Velvet-lined Beading Boards: These provide a soft surface that holds beads in place and reduces rolling.
- Plastic Beading Boards: Durable and easy to clean, they often have molded compartments for better organization.
- Wooden Beading Boards: Offers a sturdy base and typically features a classic look.
Consider your project size and beading habits when selecting the type. Each type has its advantages depending on your needs.

Features to Consider
When selecting a beading board for bracelets, here are some key features to look for:
- Gridlines and Measurements: They help in accurately spacing beads and following patterns.
- Compartments: These are essential for separating different beads and components while you work.
- Size and Portability: If you bead on the go, a smaller, portable board may be a priority.
- Material: The material of the beading board can affect your beads. Some materials may be too abrasive or too slippery.
By considering these features, you can find a beading board that enhances your bracelet-making process and makes beading more enjoyable.
Setting Up Your Beading Board
Setting up your beading board for bracelets properly can make or break your project. A well-organized board ensures a smooth beading experience.
Organizing Beads and Components
Start by sorting your beads and components. Group them by size, color, or type. Use your beading board’s compartments to separate these groups. This prevents mix-ups and saves time during bead selection. Always place your most-used beads within easy reach.
Here are some tips for organizing:
- Use color-coded or labeled containers for different bead types.
- Arrange beads in the order you will use them in the pattern.
- Keep extra beads handy to replace any that may get lost or damaged.
Measuring and Layout Tips
A critical part of setting up is measuring and planning your bracelet layout. This ensures that your final product has the right fit and look.
- Use the gridlines on your beading board to align beads accurately.
- Leave enough room between beads for spacing and movement.
- Double-check measurements against the intended wrist size.
- Place a ruler or tape measure nearby for quick reference.
By organizing beads and following precise measuring tips, you’ll be ready to start creating beautiful bracelet designs with confidence. Remember to keep your workspace tidy to maintain efficiency and enjoy the art of beading.
Beading Board Design Patterns
Design patterns on a beading board can significantly elevate the aesthetic appeal of your bracelets.
Symmetry and Color Patterns
Symmetry is a key element in bracelet design, providing balance and a pleasing look. Use your beading board’s gridlines to plan symmetrical patterns, ensuring each side mirrors the other. Start with a central bead or motif and work your way outwards, adding beads evenly to maintain symmetry.
Incorporate color patterns by selecting beads that complement or contrast with each other effectively. Follow a consistent color sequence or gradient to create a harmonious design. A color wheel can be a useful tool to determine which shades might work well together.
Creating Complex Designs
Developing complex designs on your beading board can be a fun challenge. For intricate patterns that include multiple bead sizes or shapes, keep a reference image or sketch nearby for guidance.
Use dividers on your beading board to allocate space for different sections of your complex design. This aids in visualizing how the bracelet will come together. Consider using placeholders for larger beads or focal points to ensure the overall pattern remains proportional and cohesive.
Always plan for the placement of smaller accent beads, which can add detail and texture to your bracelet. Remember to incorporate enough negative space within your design to prevent it from feeling cluttered.

Beading Techniques for Bracelet Making
Proper beading techniques can transform simple materials into stunning bracelets. Here’s how to master the craft using a beading board for bracelets.
Stringing Beads
Stringing is the foundation of bracelet making. Lay out your design on the beading board following your plan. Pick up beads one by one, and thread them onto your stringing material. Use the gridlines on the board to keep your pattern straight. Hold the string taut, but don’t pull too tight, to allow for some movement. Pace your beads along the string according to the layout you’ve set up.
Securing Beads
Once your beads are strung, securing them is key to a durable bracelet. At each end, tie a knot close to the last bead. If needed, use a crimp bead to fasten the ends and cover with a bead tip or crimp cover. Check for loose beads or gaps and make adjustments as necessary. Ensure knots are tight enough to hold beads but allow some flexibility for the bracelet to bend.
Adjusting Patterns on the Board
Sometimes, patterns may need adjustment during the beading process. If beads don’t fit as planned, rearrange them on your beading board. Swap out different sizes or colors until the desired effect is achieved. Be flexible with your design and don’t be afraid to try new layouts. Use your board to experiment until you find a balance between creativity and symmetry that satisfies your vision for the bracelet.
Finishing Your Bracelet
Final Adjustments Before Closing
Once you approach the end of your bracelet-making process, it’s crucial to do a final check. Lay your bracelet flat on the beading board for bracelets and look for any irregularities. Adjust any stray beads and confirm that your pattern is perfect. Ensure each bead sits comfortably next to its neighbors, and there’s no unwanted slack. This last inspection guarantees your bracelet appears professionally crafted and ready for wear.
Adding Clasps and Closures
A bracelet isn’t complete without a clasp or closure. This step secures your artwork and gives it functionality. Choose a clasp that complements the bracelet’s design and size. You can select from lobster clasps, toggle clasps, or magnetic ones for ease of use. Position the clasp carefully on your beading board, and then attach it using the stringing material and a secure knot or crimp bead. A well-attached clasp ensures that the bracelet will stay on the wrist confidently, marking the perfect finish to a beautifully beaded creation.

Troubleshooting Common Beading Board Issues
Beading can sometimes present challenges that need quick solutions to keep your project on track.
Handling Mixed-up Beads
Mixed-up beads can disrupt the flow of bracelet making. Here’s how to handle this:
- Immediate Sorting: As soon as you notice mixed beads, pause and sort them.
- Use Trays: Small trays or separate compartments help avoid bead mix-ups in the future.
- Label Everything: Clearly label bead types and colors on containers or compartments.
These steps help prevent mix-ups and save time during your beading projects.
Dealing with Thread Tension Problems
Proper thread tension is crucial for a neat and durable bracelet. Here are tips to manage tension issues:
- Consistent Pull: Maintain a consistent pull on the thread as you bead.
- Regular Checks: Pause regularly to check and adjust tension.
- Flexible Thread: Use flexible, high-quality beading thread for better tension control.
By managing thread tension effectively, you can avoid problems that affect the quality and appearance of your bracelet.
Advancing Your Skills
As you master the core techniques of bracelet making using a beading board, look forward to expanding your skills. Challenge yourself with new patterns and designs to stay engaged and improve.
Experimenting with New Materials
Broaden your scope by trying out different beads and stringing materials. Explore options like glass, metal, or wooden beads to discover unique textures and effects. Experiment with wires, elastic, and various threads for stringing. Test how they work on your beading board for bracelets. This adds depth to your work and may open up new possibilities in your designs.
- Use your beading board to lay out and compare new materials.
- Mix and match different bead types to see what appeals most.
- Note how various stringing materials hold tension and interact with beads.
Embracing new materials can lead to unexpected and stunning results in your bracelet making journey.
Taking on Larger Projects
Once comfortable with basic bracelet designs, it’s time to consider larger beading projects. Think about crafting wider cuffs or even full bead-weaved pieces. Use your beading board to handle complex layouts and maintain organization.
- Tackle projects that require more time and beads for completion.
- Practice patience as larger projects often involve intricate details.
- Celebrate the completion of grand projects as milestones in your beading path.
With dedication and creativity, advancing your bracelet-making skills can become an exciting and fulfilling adventure.